

Head Shaving 101
Yes. We're finally talking all things head shaving. Sure, the Supply SE was designed for an incredibly close and comfortable face shave, but does it work on heads? The short answer: yes, but with the right technique!
Our previous model, the Single Edge 2.0, had a slight learning curve associated with it and was initially designed for the unique contours of faces and necks. One of our new versions, the Supply Pro is not designed for head shaving. You can use the Pro to shave your head, but there will be a learning curve and you could cut yourself.
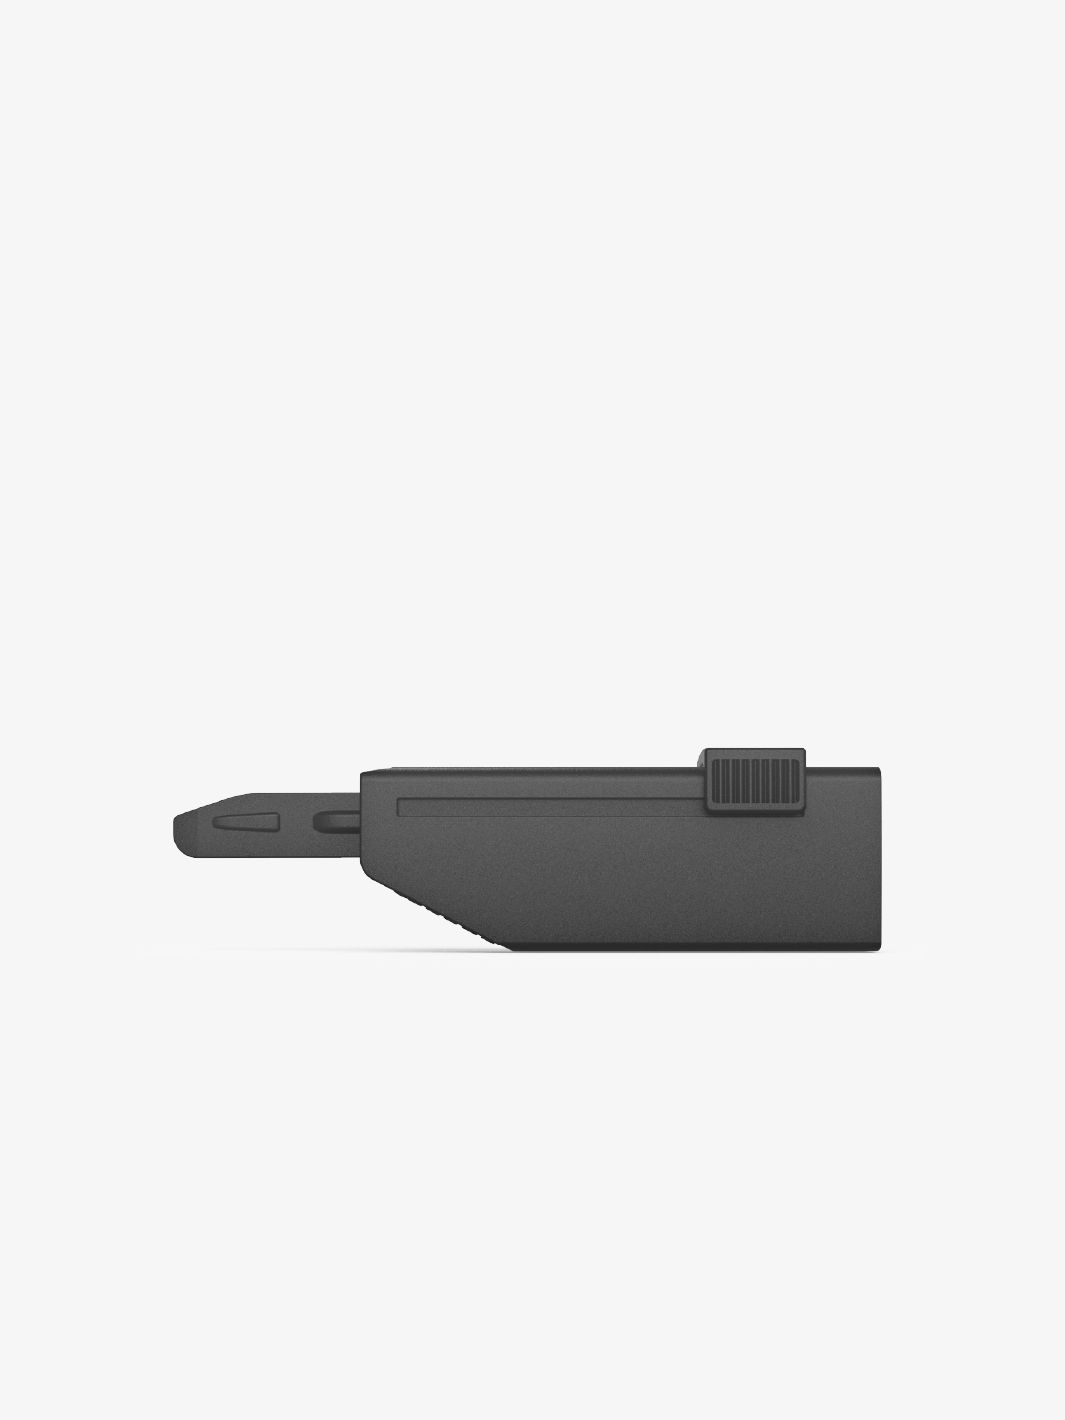
However, the Supply SE can give you a smooth head shave with little to no learning curve. Although we didn’t design it specifically for head shaving, it will work just as well there as it will on your face or any other part of your body.
The secret is our NickStopTM Technology. We created it to give you a safety razor shave that’s actually safe. It will protect your skin no matter where you’re shaving. It’s driven by 16 precision fins placed along the safety bar. They lift and guide hair to the blade so you only shave hair, never skin. We made it for your face, but this is truly the first safety razor for every part of your body.
Now, let’s talk about head shaving.

The Tools
- High quality shaving cream: A thick, foamy cream with a shea butter base like our Ultra Lather Shaving Cream is recommended to aide in protecting and moisturizing the scalp.
- Shave brush: Using a shave brush will whip up a thick, protective lather, as well as prepare your hair for optimal shaving conditions. Need suggestions? Here's our shameless plug for the Silvertip Synthetic Brush.
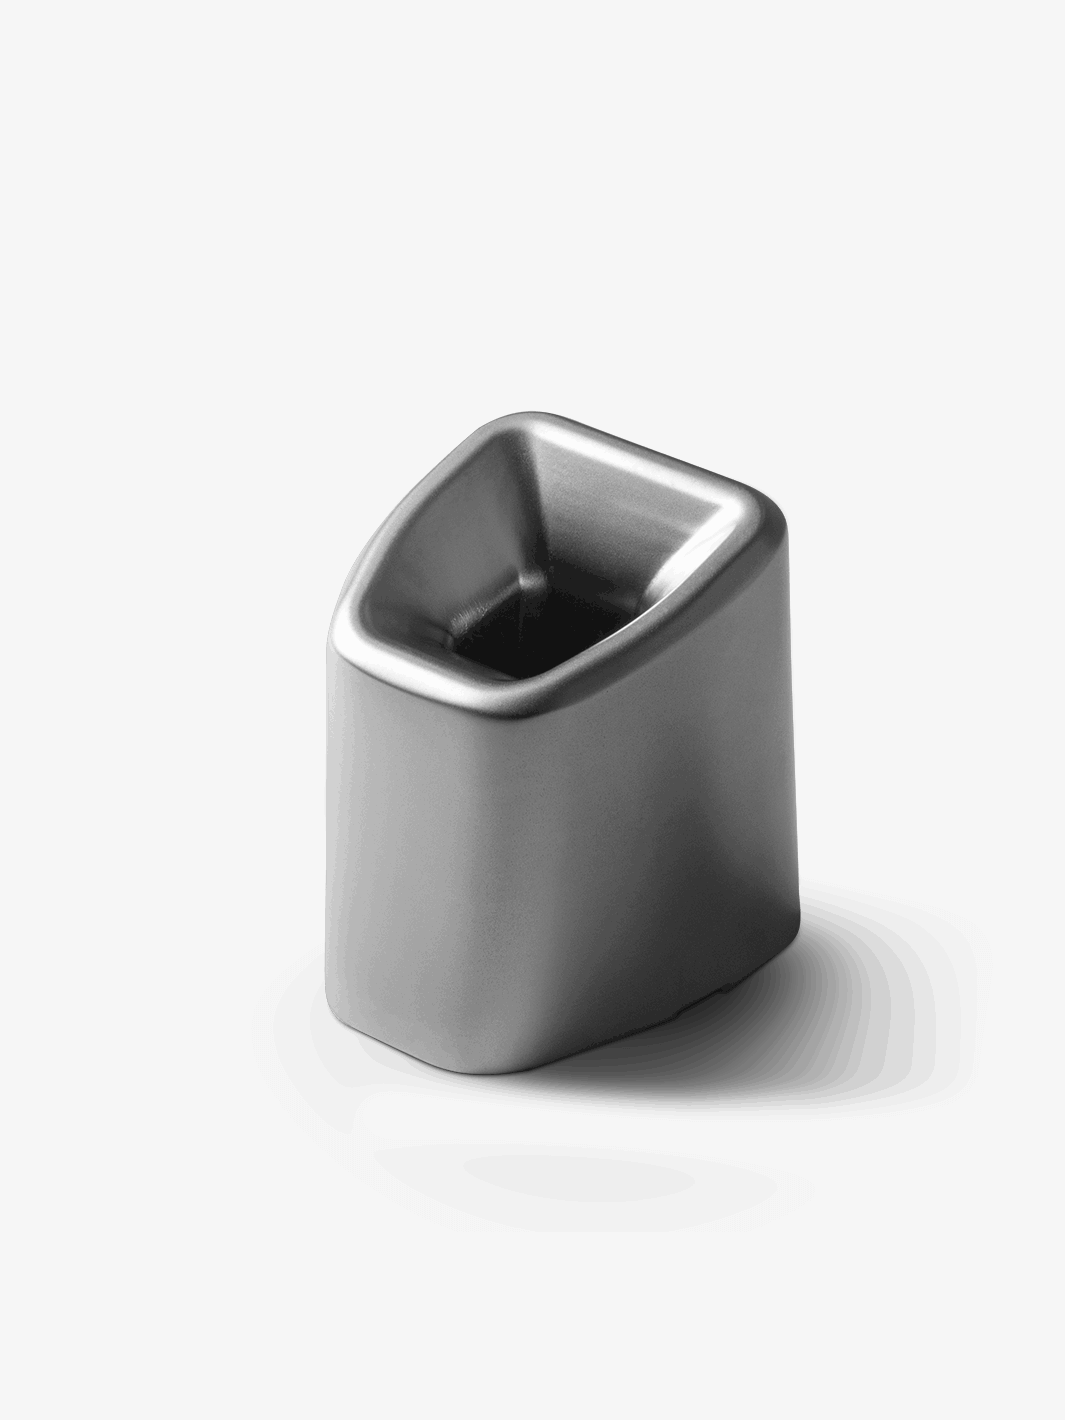
- Bowl: Using a shave bowl or cup allows you to store that rich lather for the duration of your shave. Our Marble Shaving Bowl will keep your lather warm for your first AND second pass.
- The Supply SE
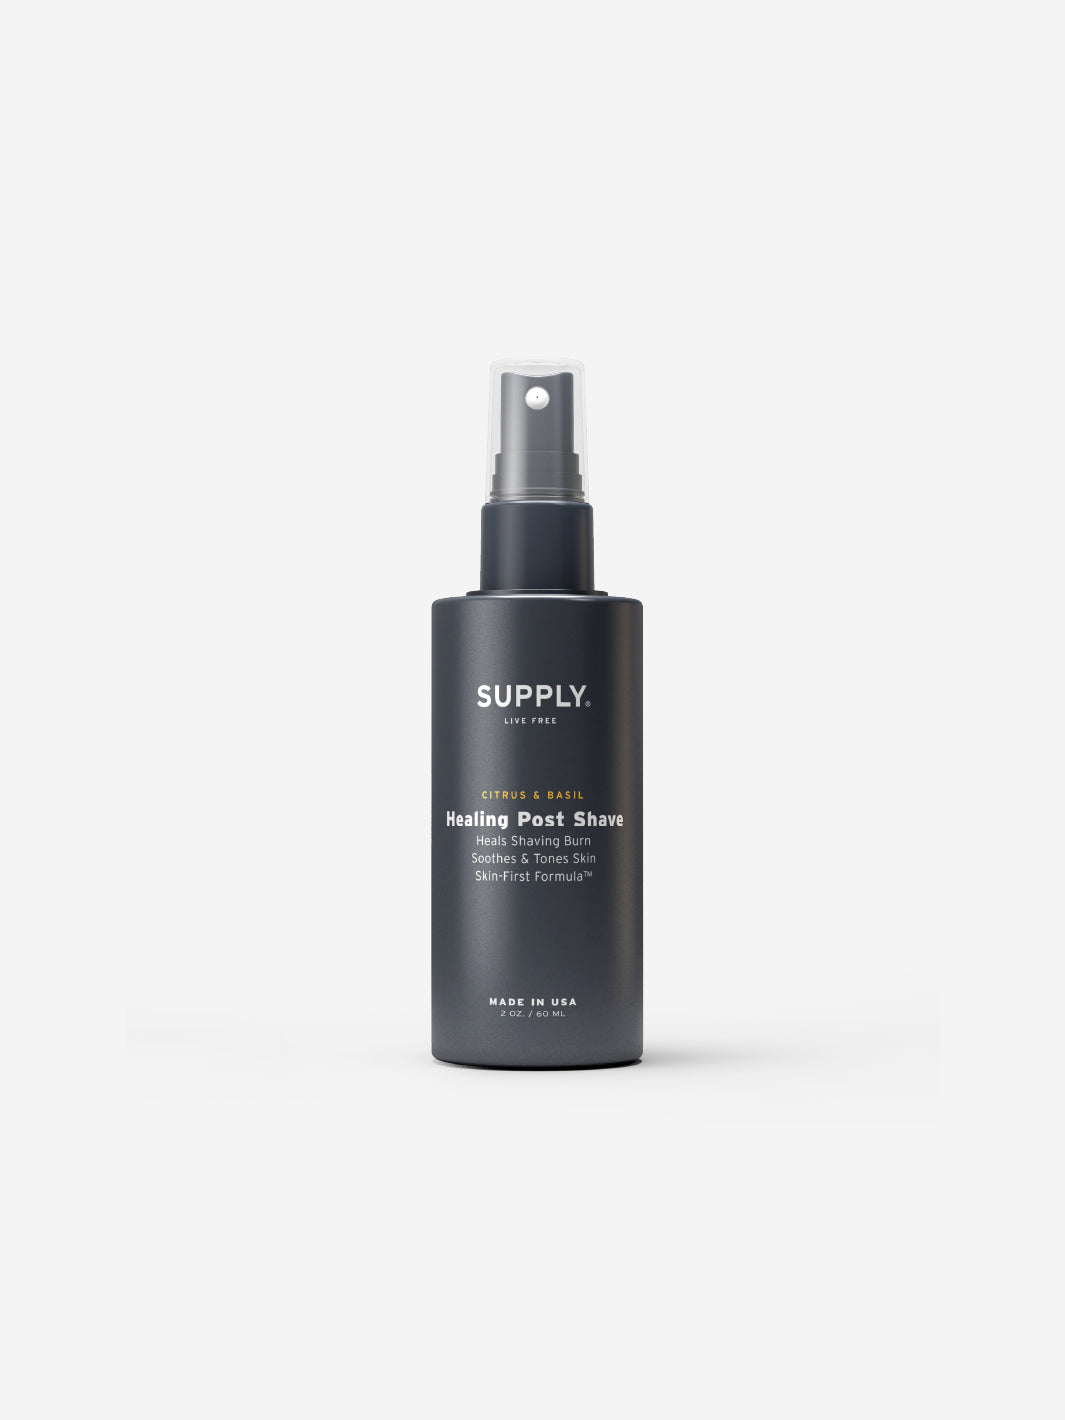
- Post shave product of your choice: Your aftershave should heal and restore balance to your scalp. Ours is crafted with an aloe vera base instead of alcohol, locking in moisture.
 The Preparation
 The Preparation
Start with a nice, hot shower. The steam and warm temperature will soften your hair and open up pores, preparing your skin.
If you don't have time for a shower, you can use a damp, warm towel. Massage scalp thoroughly with your fingertips, making sure to stimulate your scalp throughout the process. It’s doesn’t work exactly the same as the shower, but it has a similar effect.
Next, you'll need to map the direction of your hair growth. This step is especially important when shaving your head, because we recommend only shaving with the grain. Shaving against the grain will increase the possibility of irritation and nicks on your cabeza. ¡No es bueno!

The Lather
Fill your shave bowl or mug with hot water and let it sit for a few minutes so the bowl can heat up. Once it is warm, dump out the water.
Our Marble Shave Bowl is designed to retain heat three times longer than ceramic bowls.
Next, take a finger scoop of shave cream and rub it into the bottom of the bowl. With your brush, whip the cream into a thick lather. If you're having trouble building a thick, foamy lather, just add more water until it reaches your preferred consistency.
To apply, use circular motions with your shave brush to cover your entire head in a cushiony lather. Using a shave brush to apply cream will gently lift hairs and exfoliate your skin in preparation for your shave.

The Shave
Grab your trusty Supply SE. In front of a mirror, start with light, short strokes on the easier, more visible spots of your head. Remember - absolutely NO pressure! Let the weight of the razor do the work and gently "sweep away" your hair. Make sure to shave with the grain to avoid irritation.
Once you have completed the top and sides of your scalp, it’s time to move to the back of your head/neck area. These areas are especially sensitive and since they’re in your blind spot, do everything you can to cheat. Use extra mirrors or tag in a friend, no one here is judging!
Most people’s hair growth makes it challenging to shave with the grain in these areas, so do anything you can to make it more accessible.
Once you've completed your first pass, you will want to examine your head to see if any areas were missed. If you find any patches, it’s time to take the SE for round two.
But wait! Don’t just start stroking with your razor no matter how minor the spots seem. You want to avoid the blade touching your skin as much as possible to reduce the chance of irritation and razor bumps. Re-lather! Re-lather! Re-lather!

The Finish
Finally, the easy part. Since all the heavy lifting was taken care of during your preparation, your last step is to moisturize your scalp.
Rinse your head with cold water to clean off any excess shave cream and hair. This will also tighten your pores in the process. Dry off your head with a clean towel, paying careful attention not to rub.
Apply your post shave of choice. Our Healing Post Shave has ingredients that will heal, restore and moisturize your skin. You’re officially ready to take the world head-on!