


the single edge se
Master the Single Edge SE
Four steps from unboxing to your first shave. Take your time. Each one matters.
Not sure single-blade shaving is for you?Take the quiz →

STEP-BY-STEP
Guided Setup
Install the Blade
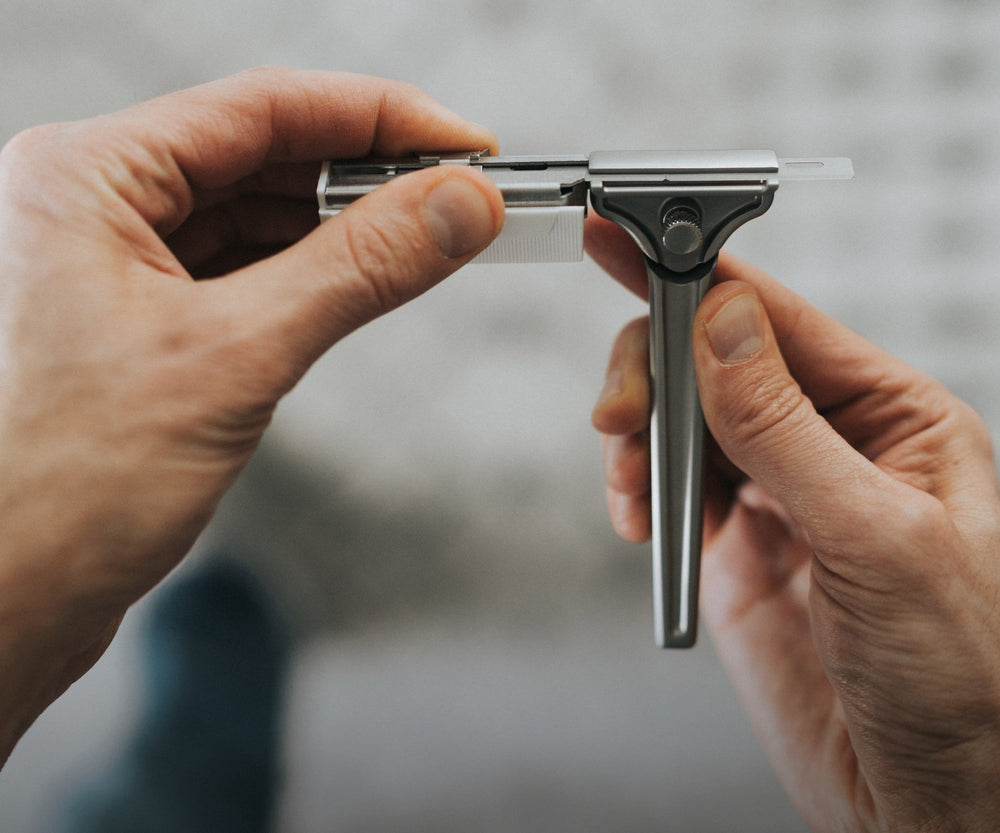
Our blade pack has a key that fits into the right side of the razor head. Make sure you push the key all the way into the opening on the razor head until it stops.
- The blade pack includes an injector key. Insert it into the right side of the razor head and push until it stops.
- Pull the slide on top of the injector pack back toward you. This loads the blade onto the key.
- Push the key into the razor head until it stops. Pull the key out. the tension in the razor sets the blade into shaving position.
- The back of the blade pack has a slot for used blades. Slide each used blade in as you go. When all 8 are used, recycle the whole pack.

Prepare Your Skin
What you do to prepare your skin for the shave is essential for the best shave possible.
- Preparation determines the shave. Warm skin, good lather, right tool.
- Warm water softens the hair and opens the follicles. Shower first, or press a warm damp towel to your face for 30 seconds before you start.
- Scoop a small amount of shaving cream into your bowl or palm. Wet the brush, push it into the cream, and work in circular motions until the lather builds. Add a drop more water if it's too stiff. Add a touch more cream if it's too thin.
- Good lather is functional, not decorative. It protects the skin and lets the blade move cleanly. Get it right before you pick up the razor.

Your First Shave
Your first shave sets the foundation. Focus on angle and zero pressure, speed comes later!
- Your first shave sets the foundation. Focus on angle and zero pressure. Speed comes later.
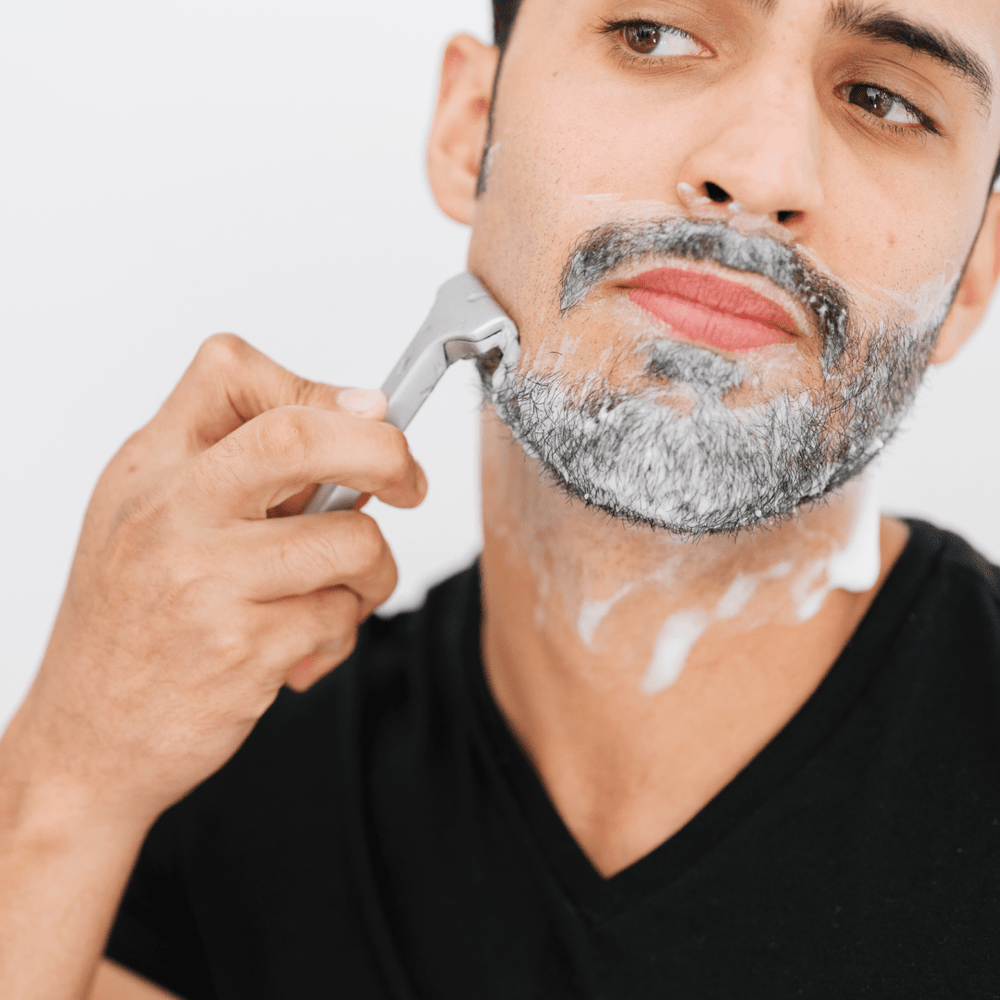
- Place the Supply logo flat on your skin. That's your angle guide.
- Slowly tilt the razor down until you feel the blade engaging with the hair. Hold the razor at roughly 30° and let the weight do the cutting. No pressure.
- Shave with the grain on your first pass. No against-the-grain yet.
- Short, steady strokes. Rinse the blade every 2–3 strokes.
- One pass is enough. Resist the temptation to go over it again.
- You'll know you have the right angle when the cream clears cleanly along with the hair. If you're seeing tread marks left in the cream, the angle is off. Adjust until it disappears. You'll know when you find it.

Aftercare & Maintenance
How you care for your razor and skin after each shave determines the quality of the next one.
- Rinse thoroughly under running water. No need to disassemble. Shake off excess water. Store upright in a dry area.
- Apply a post-shave balm to calm the skin. Avoid anything alcohol-based.
- Don't touch freshly shaved skin with dirty hands.
- Replace the blade every 5–7 shaves or at the first sign of tugging. Don't push a dull blade.
- Deep clean the razor monthly with mild soap and a soft brush.
- You've got the setup. Now go earn the shave.

COMMON ISSUES
Troubleshooting
Every issue has a cause and a fix. Select what you're experiencing.
Razor Burn
Angle: Place the Supply logo flat against your skin and sweep with no pressure until the razor clears cream completely with no residue. That's your angle
Pressure: Let the weight of the razor do the work. Pressing harder doesn't get you closer - it only gets you irritated.
Cream: It's a protective cushion between blade and skin. If it's watered down too thin, it's not doing its job.
Blade: A dull or damaged blade is the cause most of the time. Load a fresh one and make sure the cutting edge isn't dragging on the blade stop during installation.
Not Cutting Close Enough
Angle first. Logo flat on skin, no pressure. Tilt down until the blade engages. The right angle clears cream cleanly with no residue or fin marks. If you see either, reposition and try again.
Map your grain. Shave with the grain on your first pass. Add a second pass across the grain where you need more closeness. Avoid against the grain in sensitive areas.
Fresh blade. If angle and technique are right and you're still not getting close, the blade has dulled or was damaged during loading. Load a new one and make sure the cutting edge sits above the blade stop, not dragging along it.
Nicks & Cuts
Drop the pressure. Pressing down is a direct cause of cuts. The razor does the work. You just guide it.
Check your angle. Logo flat, no pressure, cream clears completely with no residue or fin marks. If you see either, adjust.
Check your cream. Thin, watered-down cream isn't protecting your skin. Build proper lather before you pick up the razor.
Map your grain. Shave with the grain in areas where you're getting nicks. Relather for a second pass if you need more closeness. Never against the grain in sensitive areas.
Inspect the blade. Tugging or uneven cutting usually means a dull or damaged blade - often from loading. Reload a fresh blade carefully, keeping the cutting edge above the blade stop the entire time.
Shaving Your Neck
Prep properly. Shave after a shower or press a hot wet towel against your neck for a minute first. Soft hair, clean skin.
Use real cream. Skip aerosol gels and foams. A quality shaving cream builds a thicker lather that lifts the hair and protects the skin.
No pressure. Guide the razor, don't push it. If you feel yourself pressing, load a fresh blade.
Map your neck grain. Neck hair grows in multiple directions. Shaving against it pulls hair back into the skin - the main cause of ingrowns. Let your beard grow a few days, photograph it from a few angles, use that as your map.
Rinse after every stroke. Cream, hair, and skin buildup between strokes dulls the blade and causes irritation. A quick rinse keeps each pass clean.
Finish with balm. Alcohol-free post-shave restores moisture and calms the skin.
How long do Blades last?
How to clean the SE
After every shave. Rinse under hot running water. Shake out excess water. Store upright.
For stubborn residue. Scrub with a soft brush and dish soap. Won't damage the finish. Rinse and dry thoroughly.
Deep clean. Loosen the screw completely to separate the setting from the handle. The blade will fall out - have a fresh one ready. Watch for the small spring around the screw. Clean all parts using the steps above, reassemble, load a fresh blade.
Store upright. A razor stand keeps the SE dry between shaves, prevents blade rust, and extends blade life.
Occasional sterilization. Dip briefly in rubbing alcohol or a barber-grade cleaner like Barbicide. Not every shave - but build it into your routine.
VIDEO LIBRARY
Watch & Learn
Common Questions
Quick answers to the frequently asked questions about the Single Edge SE.
What angle should I hold the razor?
Around 30 degrees. The easiest way to find it: place the head flat against your skin, then tilt the handle away slightly until the blade engages. Let the weight of the razor provide the pressure - no need to push. You'll feel (and hear) when you've found the right angle. If cream is clearing cleanly with no residue, you're there.
What blades are compatible?
The SE works with any standard injector-style single edge blade. That said, Supply blades are thinner and sharper than most third-party options - and the only blades designed and tested specifically for the SE. Each pack includes 8 blades, roughly 40–56 shaves depending on your routine. You can use others. You'll notice the difference.
How do I know when to replace my blade?
Tugging is the signal. A sharp blade glides, a dull one pulls. Most customers get 8–10 shaves per blade, but skin type, hair thickness, and shave frequency all affect blade life. Don't shave on a schedule. Replace at the first sign of tugging.
How long until I get a good shave?
Give it five shaves. The first one or two are about finding your angle. By shave three it starts to click. By shave five most men wonder why they waited so long to switch. The learning curve is real - but it's short, and the payoff is worth it.
How do I dispose of used blades safely?
Every pack of Black Label blades includes a built-in blade bank on the back of the packaging. Slide used blades into the slot as you go. They're stored safely and can't fall out. When the pack is full, seal it with tape and dispose in your regular trash. Never put loose blades directly in household waste.
WE'RE HERE
Still have questions?
Our team is here to help. Every question gets a real answer.